- Cloud Security Lab a Week (S.L.A.W)
- Posts
- Create a (Forensic) Snapshot and Play CSI!
Create a (Forensic) Snapshot and Play CSI!
Today we'll learn about snapshots with a real-world security scenario that combines snapshots, cross-account sharing, and a Crime Scene Investigation.
Rich Mogull
October 17, 2024 • Estimated Reading Time: 6 minutes
Prerequisites
Your SecurityAudit account created in the Organization
The Lesson
Thanks and shoutout to Chris Farris for saving you all from the boring snapshot lab I almost made, and turning it into this series of two far more interesting labs.
FADE IN to an establishing shot of an abandoned warehouse in an industrial area. ZOOM into and through the open doorway, revealing the CRIME SCENE with our investigators standing near the evidence marker. CIRCLE PAN to the far side of the scene, then ZOOM into a ¾ shot of BOB AND ALICE, our intrepid investigators.
ALICE: They hit again. Same MO the North Korean gang has used in the last 47,562 attacks. And they didn’t even pretend to clean up this time.
BOB: It’s cryptomining for sure. EC2 this time, those animals.
ALICE: When will the public ever learn to lock their credentials. They have no idea what’s lurking on the streets… of the information highway.
ZOOM out to reveal a folding table with an open laptop. PAN around to show a browser window logged into the AWS console.
ALICE: Jimmy! Snapshot these remains and run ‘em through forensics. Let’s make sure we do our job before jumping to conclusions.
Perhaps my screenwriting skills could use a little work… but over the next 2 labs we’ll play out a little scenario and combine multiple skills together. Our primary objective is to learn about snapshots. But to make it more interesting, we’ll learn how to use a snapshot in a security investigation.
We are a long way from covering incident response with any depth. And I want to emphasize that in a real investigation we focus on IAM/CloudTrail before we worry about resources (mostly), but this is a handy skill to learn, used by every response team on the plant.
Today we’ll use the framing of a forensic investigation to learn about:
EBS volumes
EBS snapshots
Cross account sharing
In the next lab we’ll learn what to do with the snapshots.
Forensics and Snapshots
Although your career has taken a major turn if you are hunting for hair and blood samples related to a cyberattack, digital forensics is a major domain in the information security profession, with some highly specialized skills. More skills than I needed the few times I had to do evidence searches in my paramedic/rescue days (I did find the finger, though).
Forensics covers a lot, and is essential in investigations. Just like those CSI shows, we hunt for evidence left behind by an adversary. It’s also important to preserve the evidence for those incidents which might eventually involve law enforcement and/or lawyers.
Disk forensics (or drive/storage forensics) is one form of forensics used in tons of investigations. In the physical world of laptops and hard drives we use special hardware with “write blocks” so we can safely copy the contents of a drive without modifying what’s stored there, which could contaminate the evidence.
We don’t have physical hard drives in AWS. Well, AWS does, but we use virtual hard drives called Elastic Block Storage because in the cloud, we can’t use simple names Instances can have multiple EBS Volumes (drives) attached to them. One is always the boot volume, and we’ve been creating them with every one of our instances. One important feature of EBS is snapshots.
An EBS snapshot is a point-in-time copy of an EBS volume. Snapshots are incremental, meaning that only blocks on the device which have changed since the last snapshot are saved. EBS snapshots are stored redundantly in multiple Availability Zones using Amazon S3 for high durability — but users can’t see them in S3, that’s just the backing service.
They can be used to create new EBS volumes, which is particularly useful for backup and disaster recovery, or to migrate data between AWS regions. Snapshots can be shared with other AWS accounts or made public (yeah, you’re right — we’ll come back to that later).
Snapshots are awesome for security because we can make a copy of an instance’s drives — which we can’t modify! Snapshots can be deleted, but cannot be edited. We can copy them and make new ones, but they provide much of the value of write-blocking hardware. The volume under investigation isn’t modified, the snapshots can’t be changed, and everything is tied together and logged. We then load up the data for analysis tools.
Snapshot Sharing (In)Security
Snapshots can be shared with other accounts or even made public (unless you block that). This is a bit different than other cross-account sharing because it doesn’t happen within IAM or a resource policy, but directly as an attribute of a snapshot.
This is a bit weird, but remember that snapshots were a very early capability of EC2/EBS — released (I think) before IAM or resource policies existed. There’s a big security implication here since, unless you put something in place to block it, anyone with the ModifySnapshotAttribute permission can potentially share a snapshot. Here’s (roughly) what that attribute looks like as JSON describing a snapshot:
{
  "SnapshotId": "snap-0123456789abcdef0",
  "CreateVolumePermissions": [
    {
      "UserId": "111111111111"
    }
  ]
}
Snapshots are a popular data exfiltration technique, because in less mature environments this is an easy permission to miss. Attackers used to mostly make them public (heck, that was my first DEF CON cloud hacking demo 12+ years ago) but these days they share with other accounts under their control. In future labs we’ll learn more about preventing sharing, especially preventing snapshots from becoming public.
However, we do want to allow snapshot cross-account sharing for the right reasons, to the right accounts. In our case it’s how we will transfer a forensic copy out of the compromised account into our security team’s investigative environment.
Key Lesson Points
EC2 uses “virtual hard drives” known as EBS Volumes.
A snapshot is an immutable copy of an EBS volume.
Snapshots can be shared across accounts by modifying a snapshot attribute.
We can use snapshots for forensic analysis.
Attackers also use snapshots for data exfiltration.
The Lab
We’ll start by playing out the first half of a forensic investigation as you would use in an enterprise environment:
We’ll deploy a VPC and instance using CloudFormation. The instance will have a little secret hidden inside.
You will identify the instance’s EBS volume and take a snapshot.
You will modify the snapshot’s attributes to share it with your SecurityAudit account.
Important note: In an enterprise we would normally set up an account dedicated to forensic acquisition, and that team would have cross-account access so they could take and share snapshots from any account into this environment. To keep these labs moving along, we are skipping that for now and will likely set it up in labs (way) down the road.
Video Walkthrough
Step-by-Step
First set up our environment with our little friend, CloudFormation. Log into your Sign-in portal > TestAccount1 > AdministratorAccess > CloudFormation > Create stack, and use these details:
S3 URL: https://cloudslaw.s3.us-west-2.amazonaws.com/lab41.template
Name: CSI
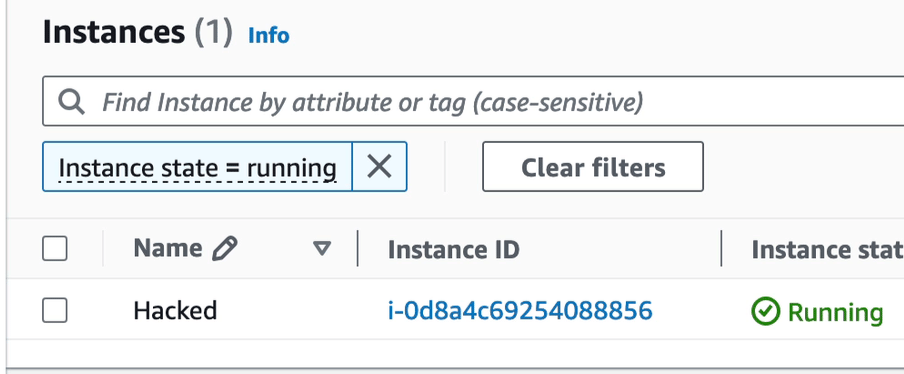
Once it launches go to EC2 > Instances:
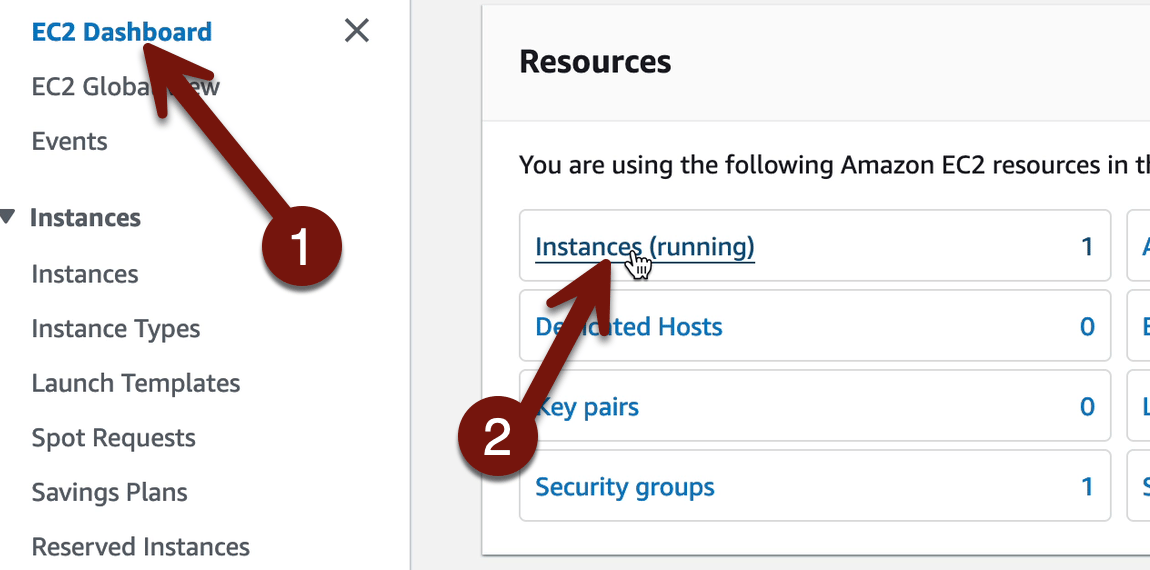
Oh no, we’ve been hacked!
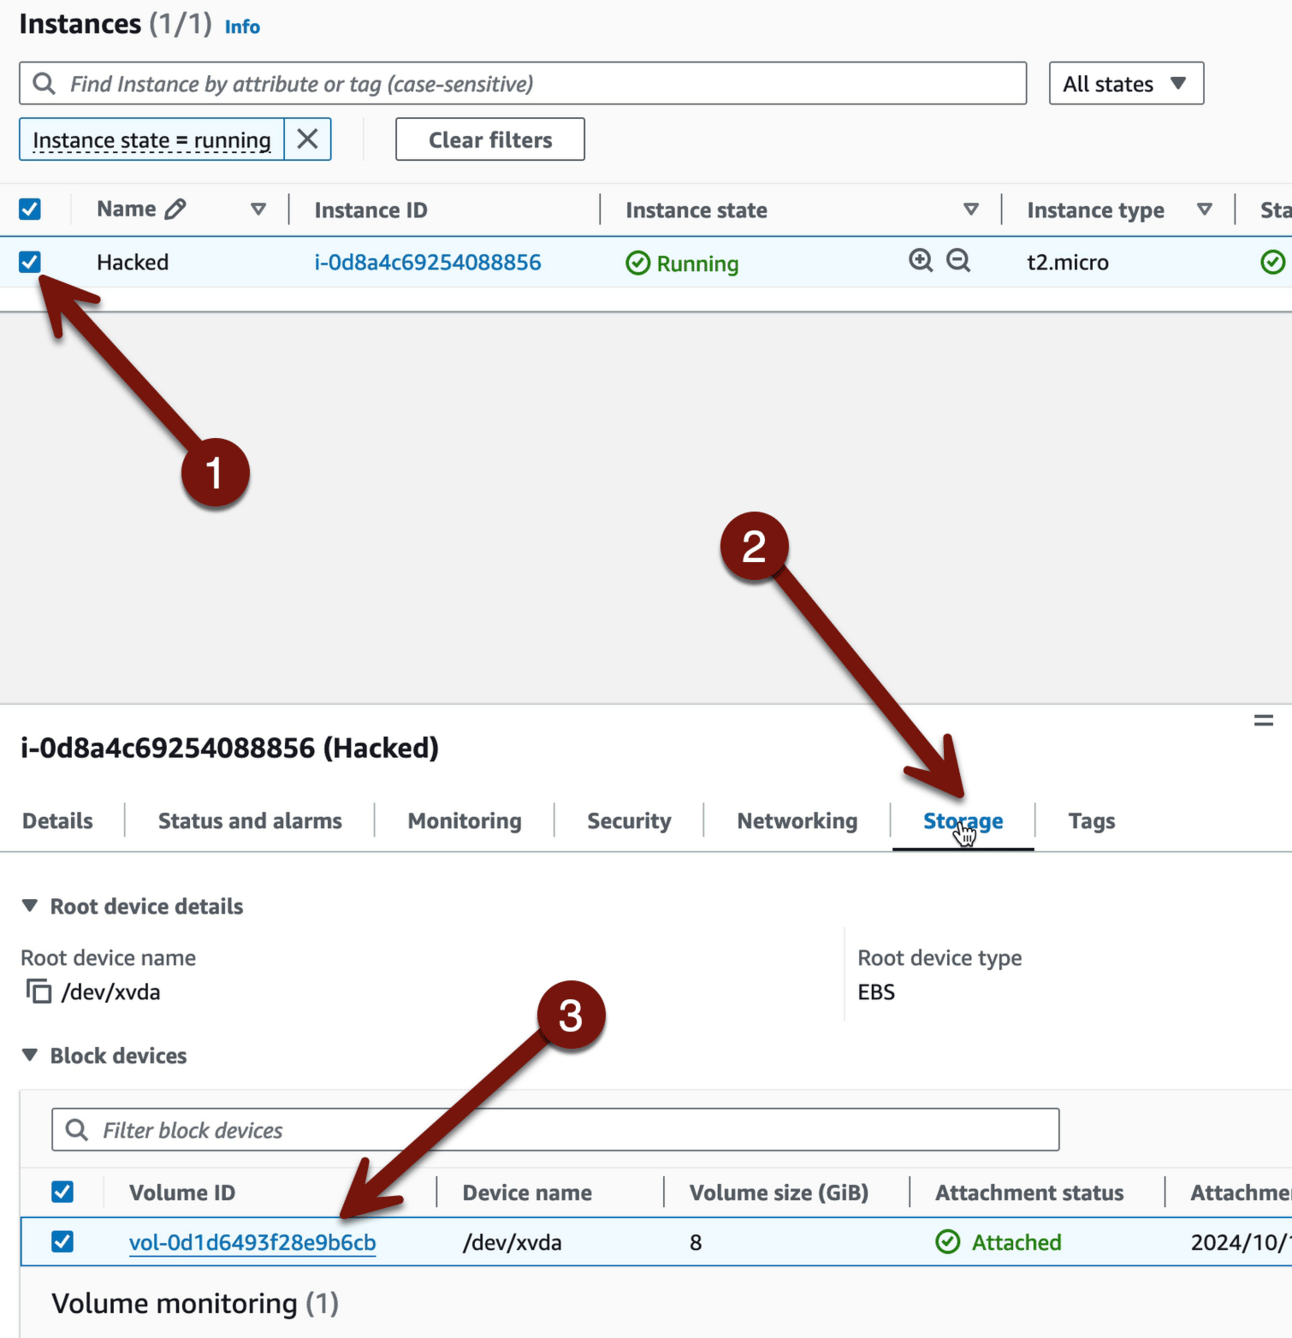
Okay, let’s run down what happened. In a real situation there’s a lot more we’d be doing to figure out the potential damage (What’s the IAM role? Was this exposed to the Internet? What data is potentially exposed?). But in our case we will skip all that to focus on setting up forensics analysis. First we need to identify the EBS Volume associated with the instance, since that’s what we need a snapshot of.
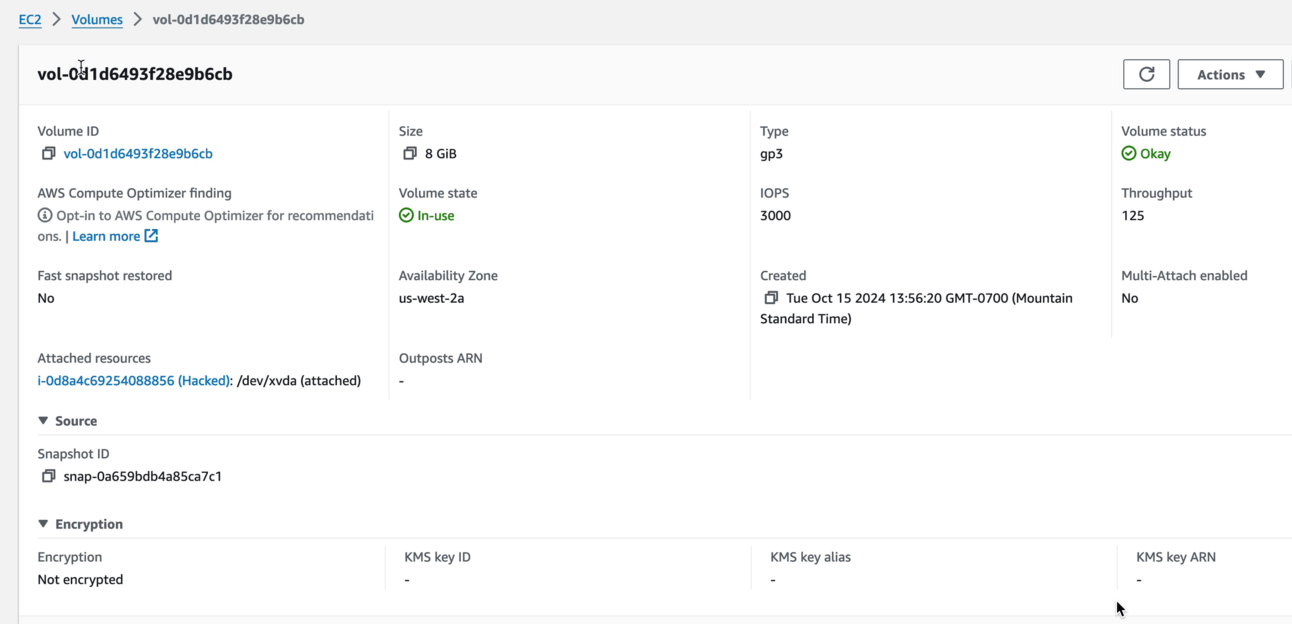
Check Hacked > Storage and then click the volume ID. Remember, every instance has a volume (mostly), which is the boot volume. As you’ll see in a minute, boot volumes are always based off a snapshot. Whazzit? An AMI is also effectively a kind of snapshot, and when we launch an instance the boot volume is loaded up with the snapshot of the operating system.
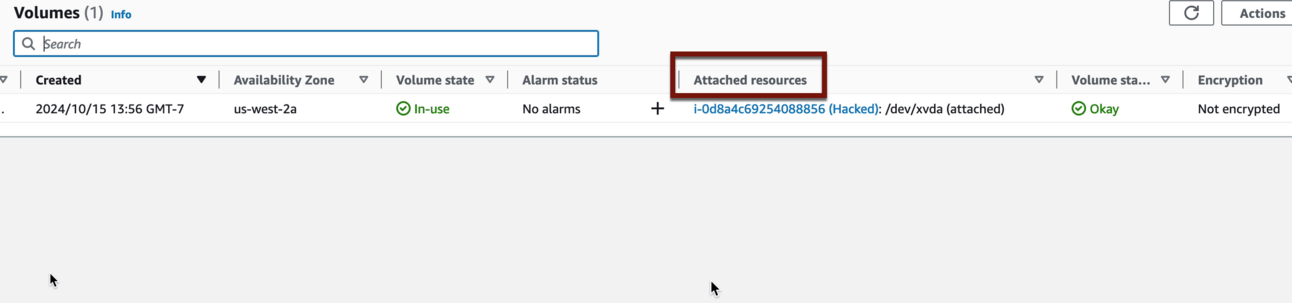
This account should only have one volume in it, but you can imagine that larger accounts may have hundreds or thousands. Sometimes we want to backtrack from the volume ID to the instance ID. For example in my incident response class we trigger an alert for a nefariously shared snapshot, and then students need to track it back to the volume, then to the instance, to figure out what might have been exposed.
Our case is super simple. If you scroll right there is a default column which shows what instance the volume is associated with. This is all also available via API, of course.
If you click the volume you can see a lot more information, including the ID of the snapshot it was based off, if any (just showing it here, you don’t have to do this). Volumes don’t need to be based on snapshots; I create empty ones all the time as extra storage drives:
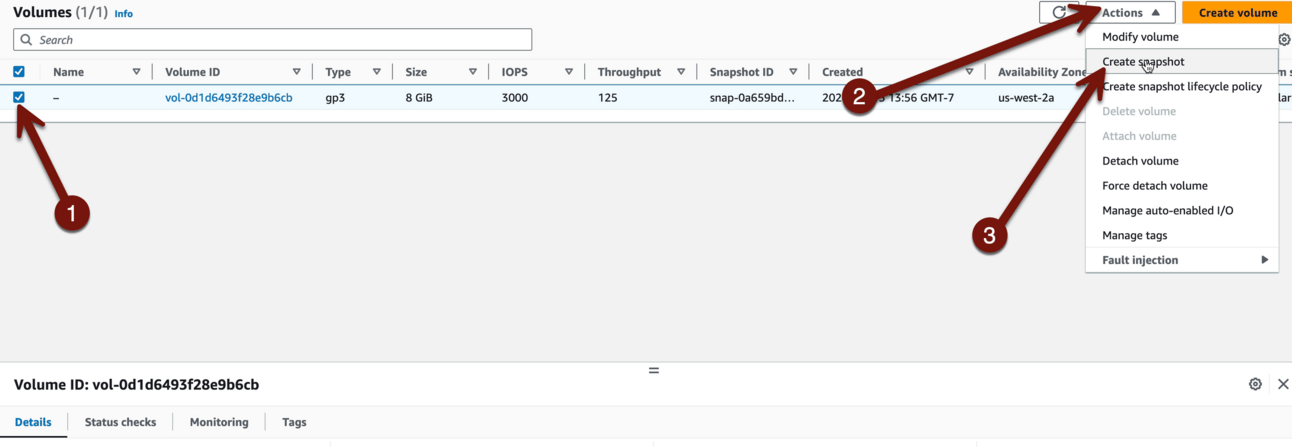
Okay, go back if you went to that screen and then check the box next to your volume, then Actions > Create snapshot:
Use Description: “CSI-incident-1” and then Create Snapshot:

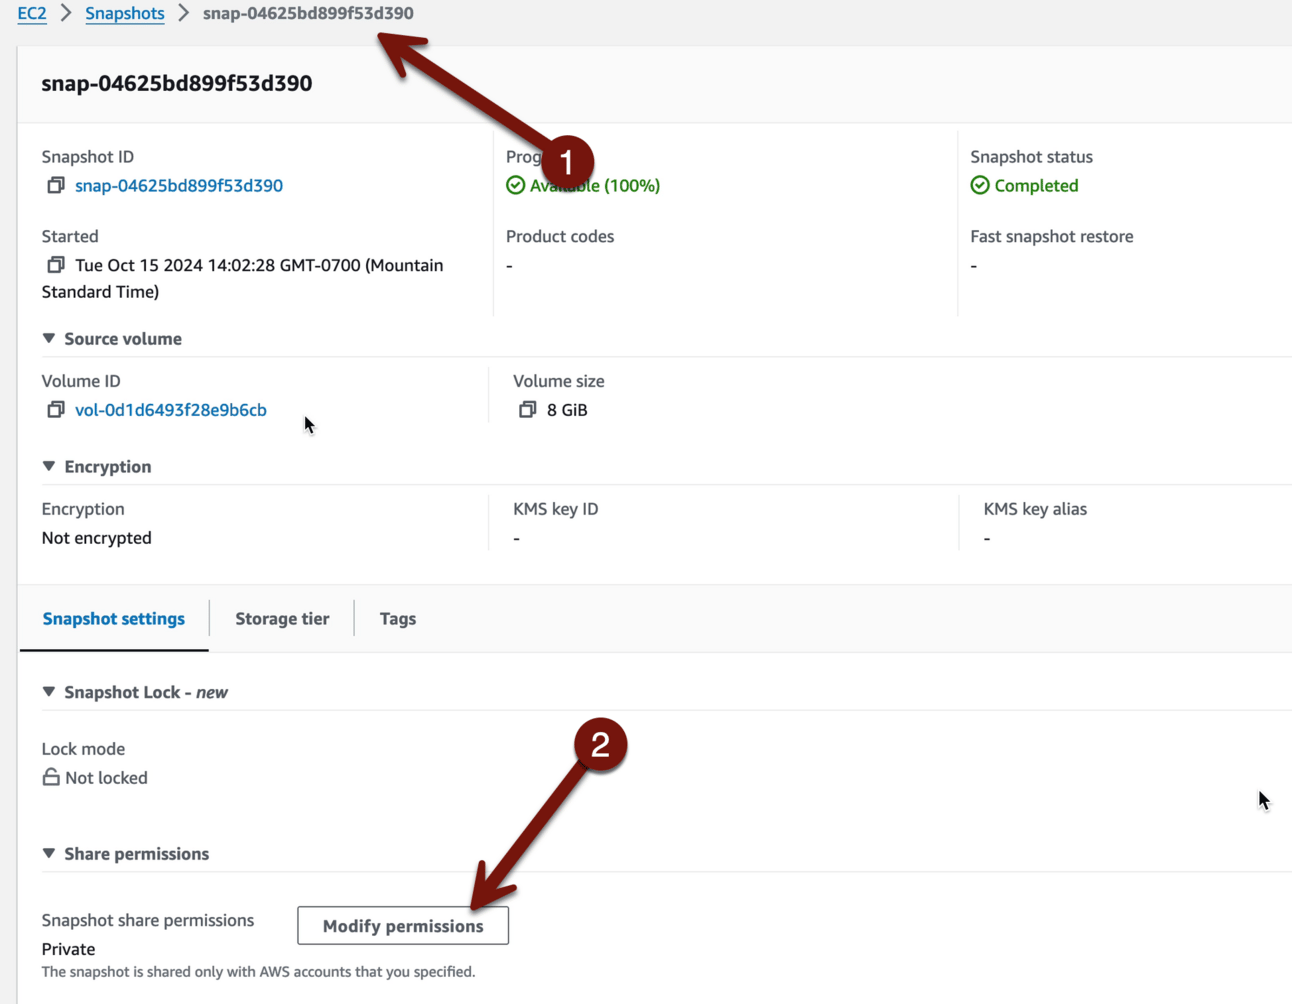
It can take a minute, so go to Snapshots > Snapshot status, and wait until it’s Available. If you want click Private snapshots and select Public. Yep, some of those probably have sensitive data! Public snapshots aren’t all evil — they are a great way to share data — but they carry real risks. We will learn all about stopping public snapshots in future labs.
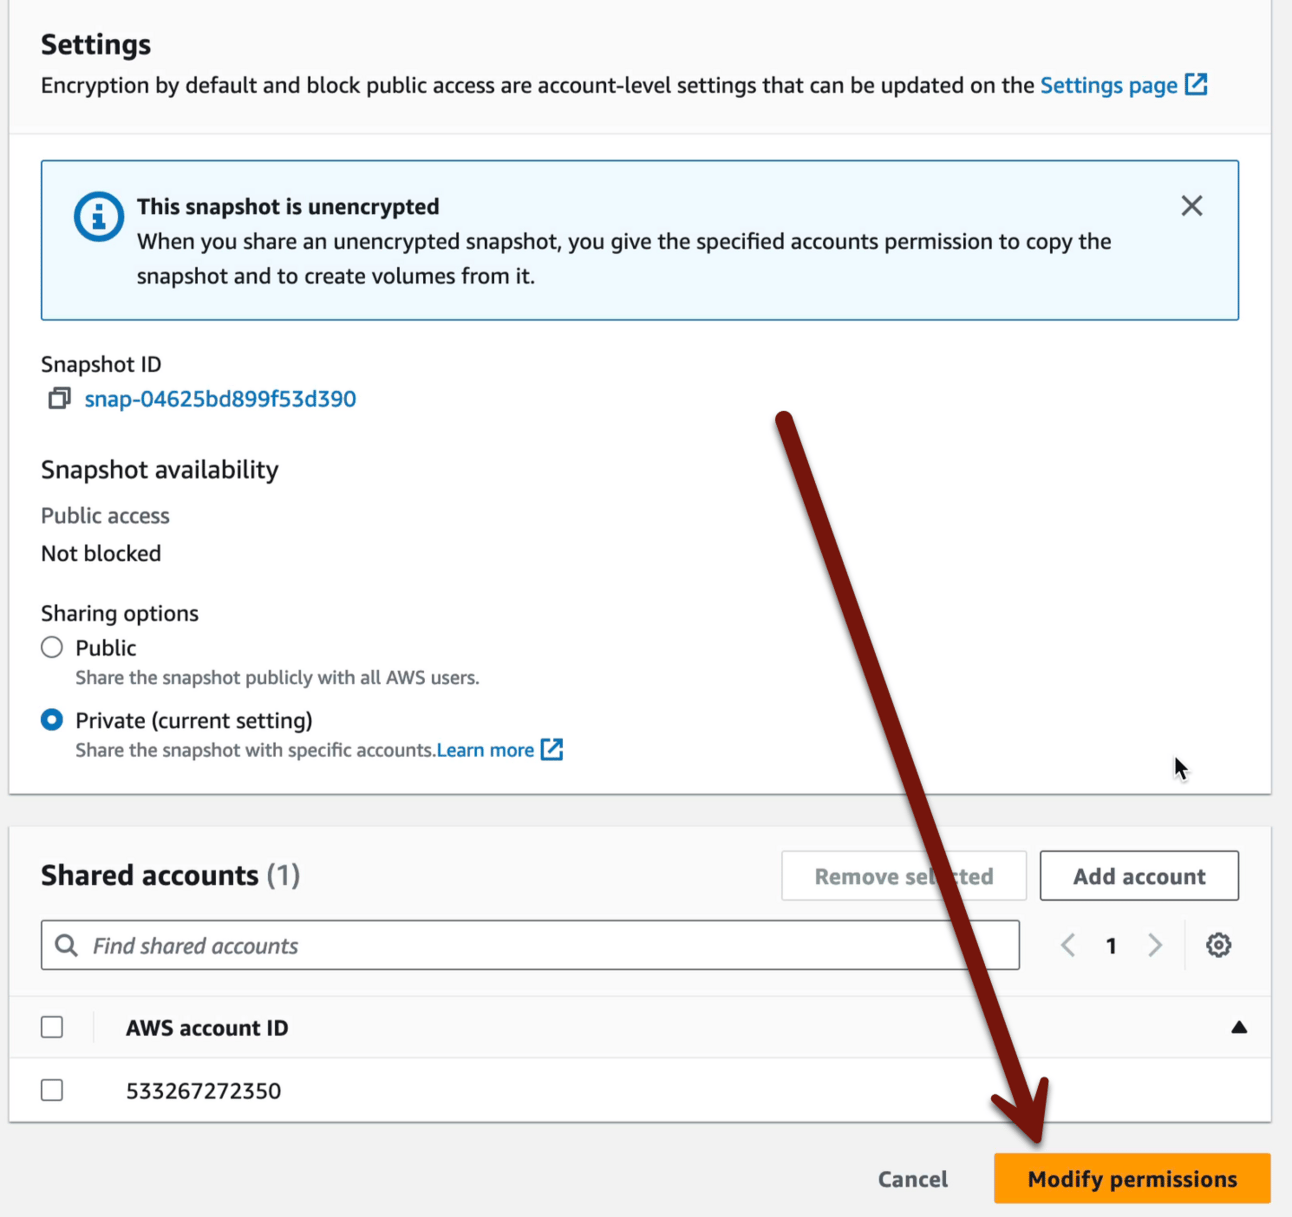
Then Click the snapshot ID and Modify permissions:
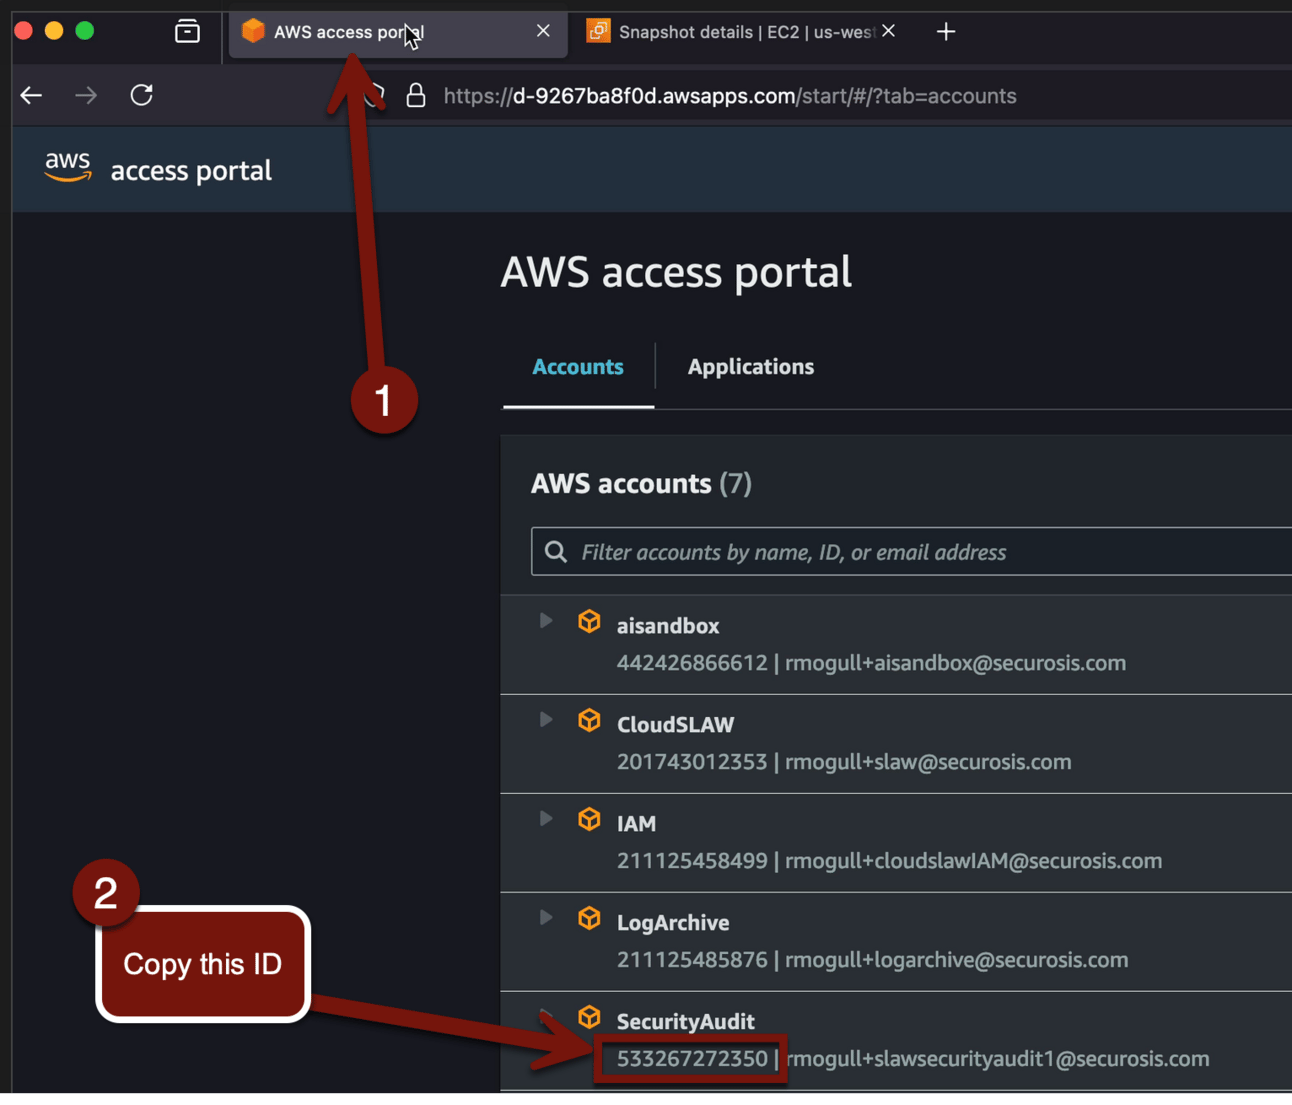
We will share this snapshot with our SecurityAudit account. In real life I would use an IncidentResponse or Investigations or equivalent account, but this will work fine and keep the lab shorter. You’ll need your account ID, which our handy-dandy sign-in portal has right there. You should still have that tab open, so swap over and get the ID:
Now swap back to the snapshots tab in your browser, select Add account, and paste in that account ID:

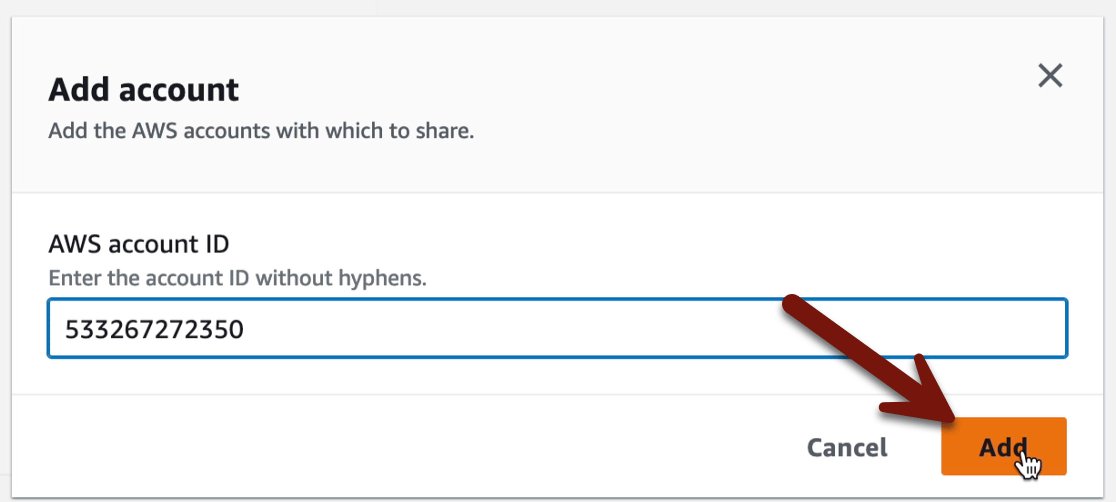
Seal it in stone with Modify permissions:
Now we have a snapshot of the hacked instance we shared with our SecurityAudit account, which we can investigate to find the little secret I planted.
But, you know, next week.
For cleanup all you need do is Cloudformation > CSI > Delete stack. The snapshot will stay because it wasn’t create by Cloudformation. In a real investigation we try to never delete resources until we know, for sure, that we no longer need them. But for our lab, all is good to wipe it out.
-Rich
Reply